
Do you need help with repairing a wool blanket? Well, you’ve come to the right place!
In a highly consumerist society and an economy that relies on single-use and fast fashion buys, repairing what you own is one of the best things you can do to avoid unnecessary wastage. Repairing saves you money, empowers you to restore the things you love, and helps release pressure on the planet from overconsumption.
If you take care of and repair your blanket, it will last you a lifetime. Here we have a friends’ moth-eaten wool blanket from one of the first Seljak Brand production runs, and our co-founder shows us how to fix it with stitching and patching to create both an invisible repair and a feature repair.
Hot tip: Air your blanket out in the sun if it’s been in storage for a long time and spot clean it if and when it gets stained to help keep your blanket for as long as possible.
You'll need:
- Fabric for a two-sided patch
- Four ply embroidery yarn in contrasting colour for feature patch
- Embroidery needle
- Regular thread to match colour of blanket for invisible patch
- Regular sewing needle
- Measuring tape
- Fabric scissors
- Smaller snippers – non-essential but useful tool for any hand sewing job

Getting prepared with patch fabric, embroidery thread and needles, measuring tape (or ruler), fabric scissors (and if you have them, snippers for ease)
Step 1: Make a repair plan
To get started, look carefully at the damage (tip: holding it against the light is useful!) and map it out using pins. Here we can see five holes of different sizes dotted in an area of about 20 by 20cm. Because the outlying hole is tiny, I saw it could be repaired with a basic cotton thread stitch job. Because the other holes are larger, we decided to go for a double-sided patch that covers all of them at once, and adds a unique feature to the blanket!

Step 2: Measure the patchable area
Work out how big the patch needs to be and give an extra 1.5cm to provide room for the stitches that will go around the patch. I used an even surface to lay out the blanket to ensure my measurements were accurate.
 Measuring how big the patches need to be
Step 3: Cut and pin the patches
Cut two patches the same size for each side of the blanket. If you have fabric marking chalk you can use that, or mark the line with pins – I just followed the straight lines of the tartan fabric. Pin one to each side of the blanket lining them up as precisely as you can.
 Cutting two patches of the same size
 Pinning the patches to the blanket on each side
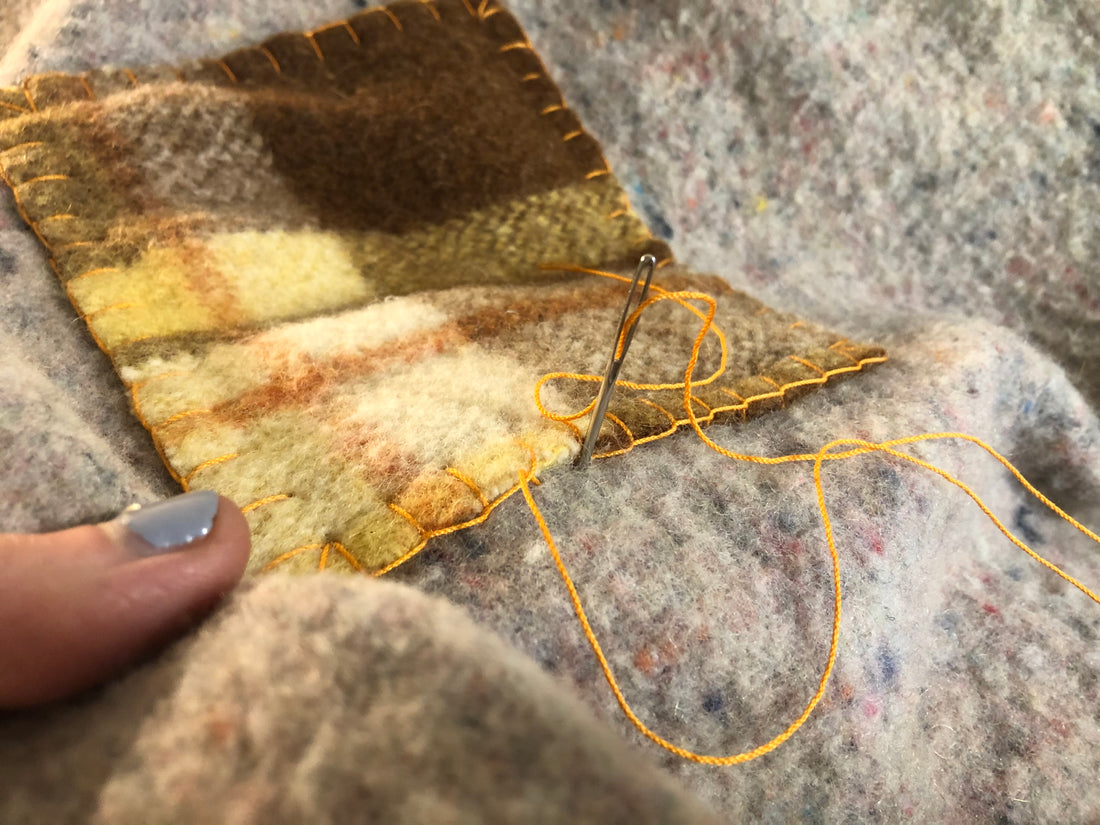
Step 4: Blanket stitch patches
Use blanket stitch to attach the patches to the blanket, using the appliqué blanket stitch technique. I did 1cm between each stitch and from the edge. Remember you’ll be stitching a patch simultaneously on the other side of the blanket! Make sure you check the back patch for each stitch, that it’s square to the last and to the edge of the patch. This is time consuming but worth getting right for a good looking end product.
 Starting the blanket stitch
Step 5: Careful stitching the corners
It’s worth doing an extra stitch to create a solid corner. Here’s the technique to blanket stitch a corner (even though the example isn’t appliqué, the same technique can be applied).
 Adding an extra stitch to the corner for strength
Step 6: Tie a hidden knot to finish
After you've sewn the full way around the patch, create a hidden ‘knot’ by stitching the blanket carefully in the same place underneath your final stitch 3 to 4 times and cut the thread. And voila! That’s your patch complete.
 Sewing the full way around the patch
 Hiding the ‘knot’ at the end
 Front and back patches
Now for the invisible repair to the outlying moth hole!
Step 7: Mark the hole
Check how big the hole is. This one is long and narrow so it should be easy to stitch together.
 Identifying the hole for repair
Step 8: Thread your needle and begin to stitch
Using the regular needle and thread, start by tying a knot at the end of your thread. Use around 30cm of thread so you’re not at risk of running out half-way through your job but there’s not so much you get tangled. Begin stitching a few millimetres from the beginning of the hole to create a secure anchor for the stitches.
 Creating an anchor at the base of the hole with a few stitches before the hole begins
Step 9: Stitch the hole together
Stitch from one side to the other and repeat (say left to right), and stitching upwards a millimetre a so at a time, so the stitches are perpendicular to the hole.
 Stitching perpendicular to the hole, a millimetre or so apart
Step 10: Return stitch for strength
Stitch back down the other way to create a strong bind.
 Stitching back the other direction means two layers of stitching make a stronger repair
Step 11: Tie off the thread
To tie off, carefully stitch in the same place 3 to 4 times a few millimetres from the base of the hole and cut the thread.
 Tie off by stitching over the same spot a few times and cutting the thread
Step 12: Lose the hole!
Check how easy it is to see your repair job when you zoom out, and enjoy your patch!
 Can you see the hole you stitched together?
Once you get the hang of patching and creating invisible stitch repairs, you can apply these techniques to your clothes too, repairing holes and tears in jeans, jackets and so on.
On the whole, repairing things saves money, builds handcrafting skills, and avoids landfill and overconsumption. Repairing is also an opportunity to give your stuff character and tell a story.
Happy repairing!